The foundation of a successful business is the repeated orders, as customers making repeated orders generate 40% of a store’s revenue. In order to stimulate your customers to buy from you again, it is important for them to trust you to provide a good user experience every time. This trust-building begins right from the beginning of your relationship with them when they subscribe to your emails. Being felt welcomed to your brand family goes a long way into having lasting relationships; an onboarding email series or even a welcome email is a great way to engage with new subscribers.
This article will reflect on the anatomy of a welcome email, different types of emails you send during the onboarding stage, and how to plan your onboarding email series.
Importance of onboarding welcome emails
Comparing your online business to a brick and mortar store, receiving a welcome email is like getting greeted by the staff as you are entering. The humane interaction you feel is the emotion conveyed by an actual human and this makes you inclined to be a part of the experience. On the contrary, imagine a scenario where the staff doesn’t acknowledge your visit & is plainly showing you the products in stock. You would either mechanically complete your purchase or even exit without even checking out what they have to offer.
Going with the inbound methodology, when someone subscribes to your emails, they are most interested in knowing about your brand and shows maximum engagement. In fact, 74.4% of consumers expect to receive a welcome email when they subscribe (Source: BlueHornet). If you grab the chance of greeting them and starting a conversation to onboard them, you manage to maintain the engagement and set a positive impression.
Owing to the expectation, welcome emails also result in 4x more open rates (~50%) and 5x more clicks (~14%) than other marketing emails. Going a step ahead, if your welcome email has a welcome offer, you stand a chance to boost revenue by 30% per email compared to a welcome email without an offer. (Source: InvespCRO)
Unless you are a well-known brand, there exists a chance that the visitors on your website may not be totally aware of who you are and when they subscribe, they are curious to know more. The onboarding welcome emails can be the foot-in-the-door that manage to:
- Welcome and thank the new subscribers for subscribing
- Introduce the brand and its products
- Set an expectation about what to expect from your emails
- Incentivize the sign-up process with a discount offer or freebie
- Increase social followers
- build a sense of customer loyalty towards your brand
Anatomy of a welcome email
As the goal of a welcome email is to ‘welcome’ or ‘onboard’ your subscribers, every element in your email needs to pass on the effect onto the email recipient i.e. your subscriber. A general onboarding email(s) can be divided into two broad categories:
- Introduction: You introduce your brand with From name, subject line, and email copy
- Action to be taken: Once introduced, this section is the action to be taken to begin interaction or engagement.
So let’s identify the different elements in a welcome email and how to optimize it effectively.
Introduction section
- Recognizable Sender Name: Imagine you are expecting a delivery of Pad-Thai noodles from your favorite Asian restaurant and receive a pizza box. Would you open it?
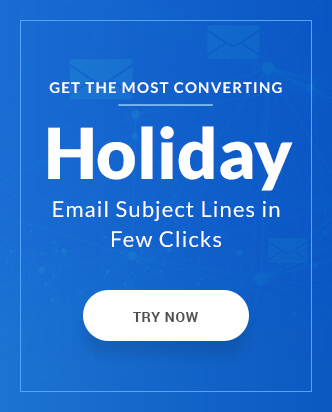
Similarly, when your subscribers receive an email from you, they expect to see a recognizable name in order to open it. A familiar sender name helps the subscriber quickly relate the email with the recent signing-up act and they are going to take the next step i.e. reading the subject line. - Subject Line & Preheader text: Subject line is the first line of interaction with the subscriber that hints about what to expect inside. Most email clients such as Gmail, iOS mail, Outlook can display 90 chars of your subject line so you need to make it the hook that prompts the subscriber to open the email to read further.
Both the emails in the example below highlight the purpose of the email. The Headspace email straightforwardly suggests what the subscriber shall expect inside with their short yet crisp subject line. With the help of the preview text, you can give a sneak peek of the first line in the email. This can act as the continuation of your subject line.
Once the subscriber has opened the welcome email, the following elements need to be there. For reference, we shall use the welcome email from Headspace to explain the different elements in an email template.
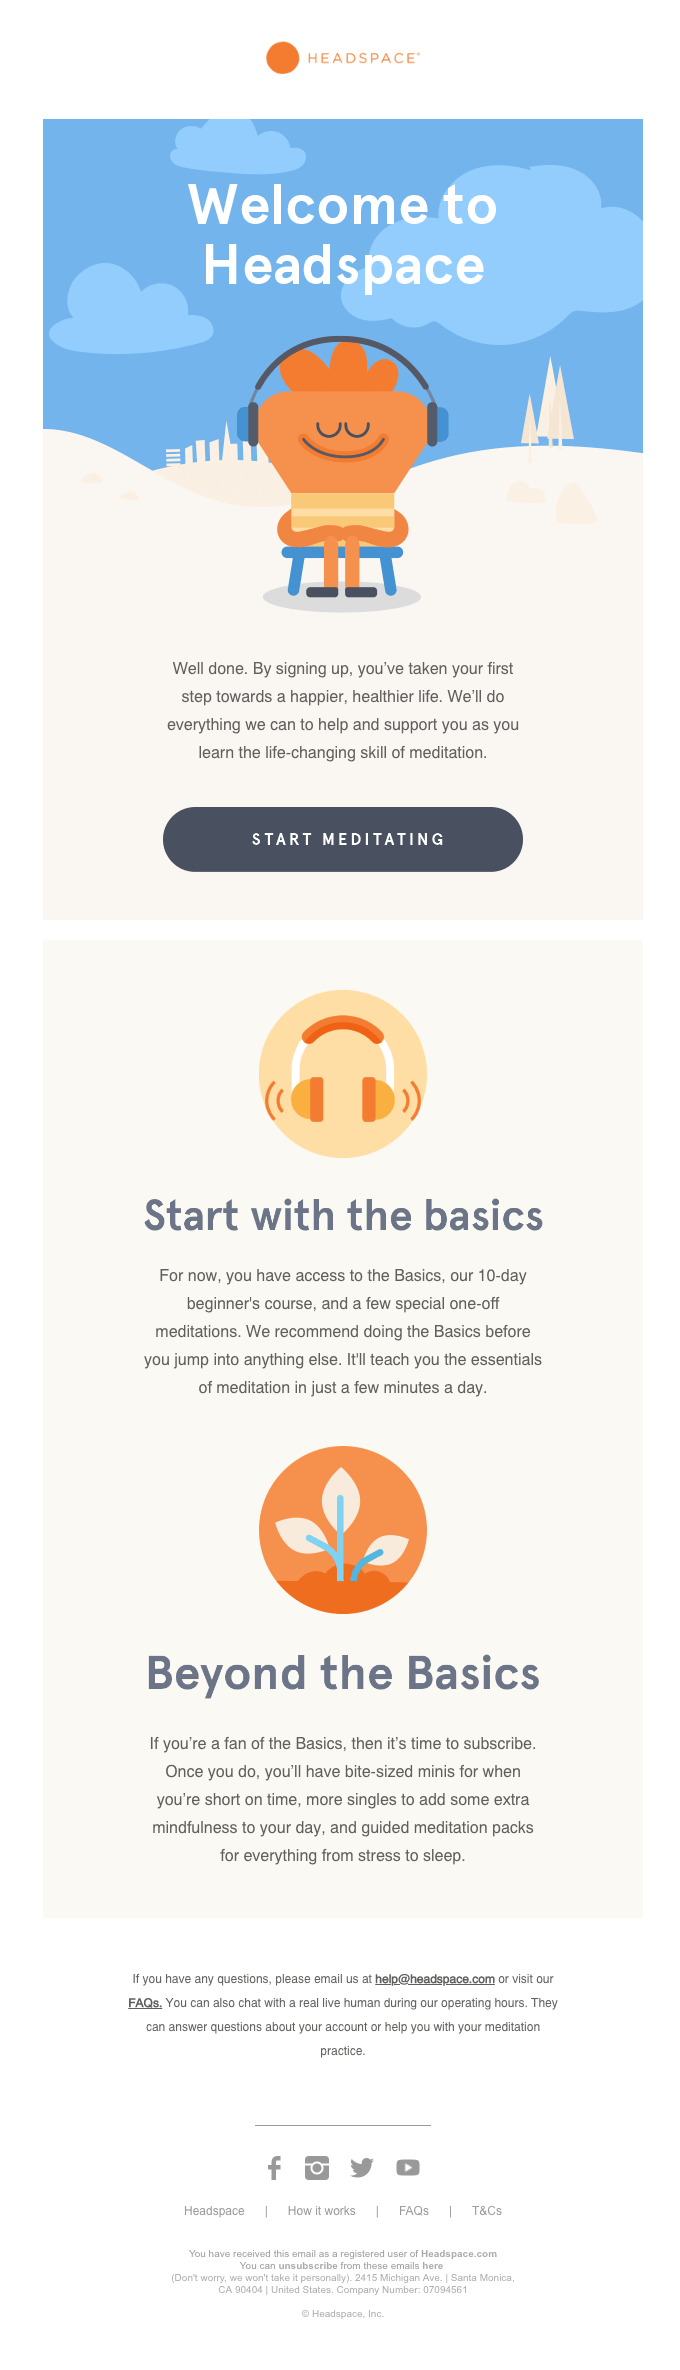
- A welcoming hero image and Headline: As per the popular adage, ‘First Impressions make Lasting impressions”, having a bold headline greet your subscribers as soon as they open the email makes a good impression. In the above email, you have a hard-to-miss banner image in the first fold of the email that welcomes the subscriber. The hero image complements the headline and together both make the subscriber feel welcomed.
- A reminder of why they signed up: Them subscribing to your mailing list is a first step towards becoming a customer. This is a big step for your brand and shows it in your email copy as well. Show your gratitude and thank them for signing up and if you have multiple sign-ups for different goals, remind them why they signed up. In the example above, the subscribers are appreciated for signing up and reminded how this step shall lead them to a happier and healthier life.
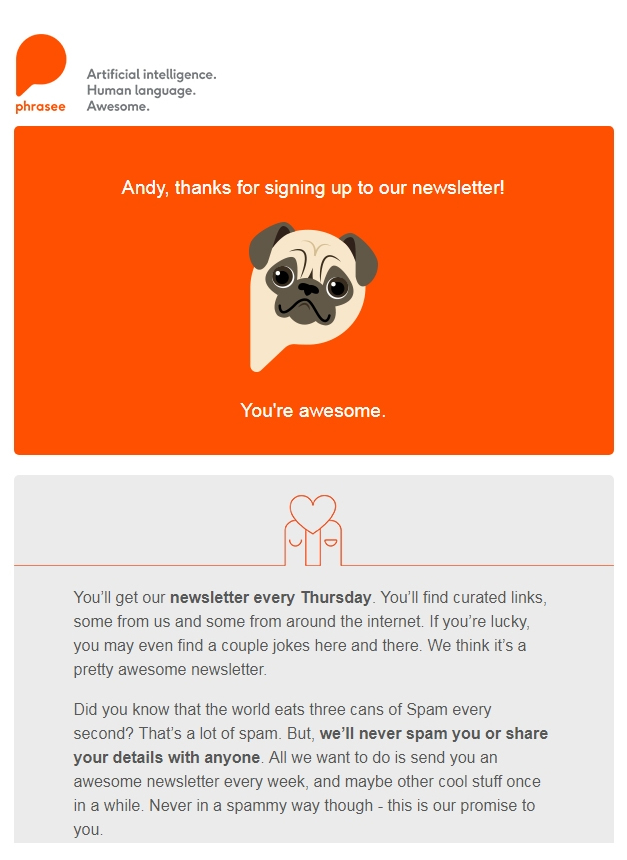
- Set expectations: Most email marketers tend to forget the fact that sending an email to their subscribers is more of a privilege and not an obligation. By not sending emails when your subscribers are most active or by bombarding them with emails at unexpected times will lead to losing out on the subscribers’ engagement. If you mostly going to send newsletter emails, inform your subscribers about when they can expect them just like demonstrated in the email below by Phrasee.
- Reward them: Every one of your subscribers subscribed in exchange for value addition of some sort. It can be a free downloadable, discount coupon or even knowledge. Fulfill the expectation and reward them with a download link (in case of downloadable) or a schedule of when they shall receive your newsletters. In the example below, the subscriber is notified about the benefits they receive in the trial period.
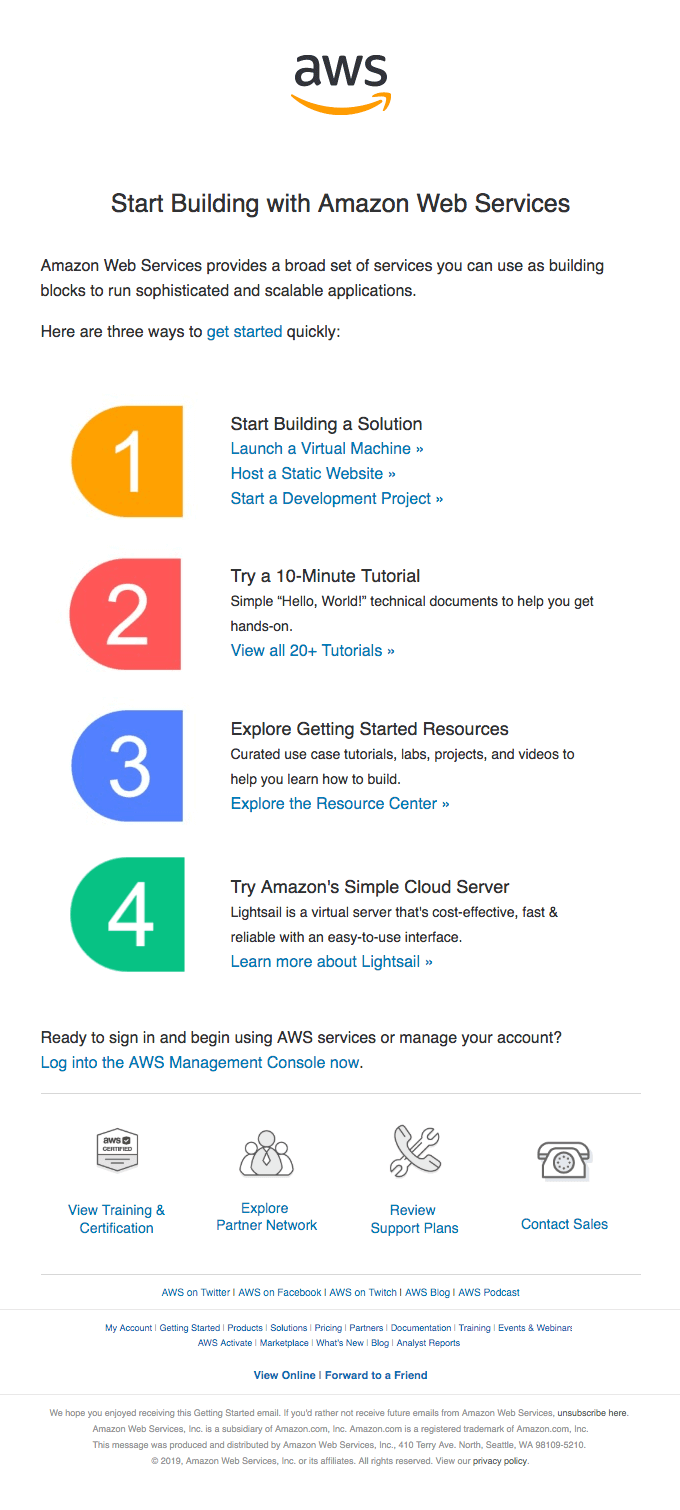
- Actionable CTA or helpful resources: An email is a bridge between two landing pages and owing to restrictions in the amount of content you can include in an email, you may not convey everything in an email. By redirecting your subscribers to a relevant landing page or links, you continue the engagement without reducing fatigue. In the example for Headspace, the CTA redirects the user to their app. In the example below by Amazon, the email acknowledges that the user has registered and suggests helpful tips for them to get started.
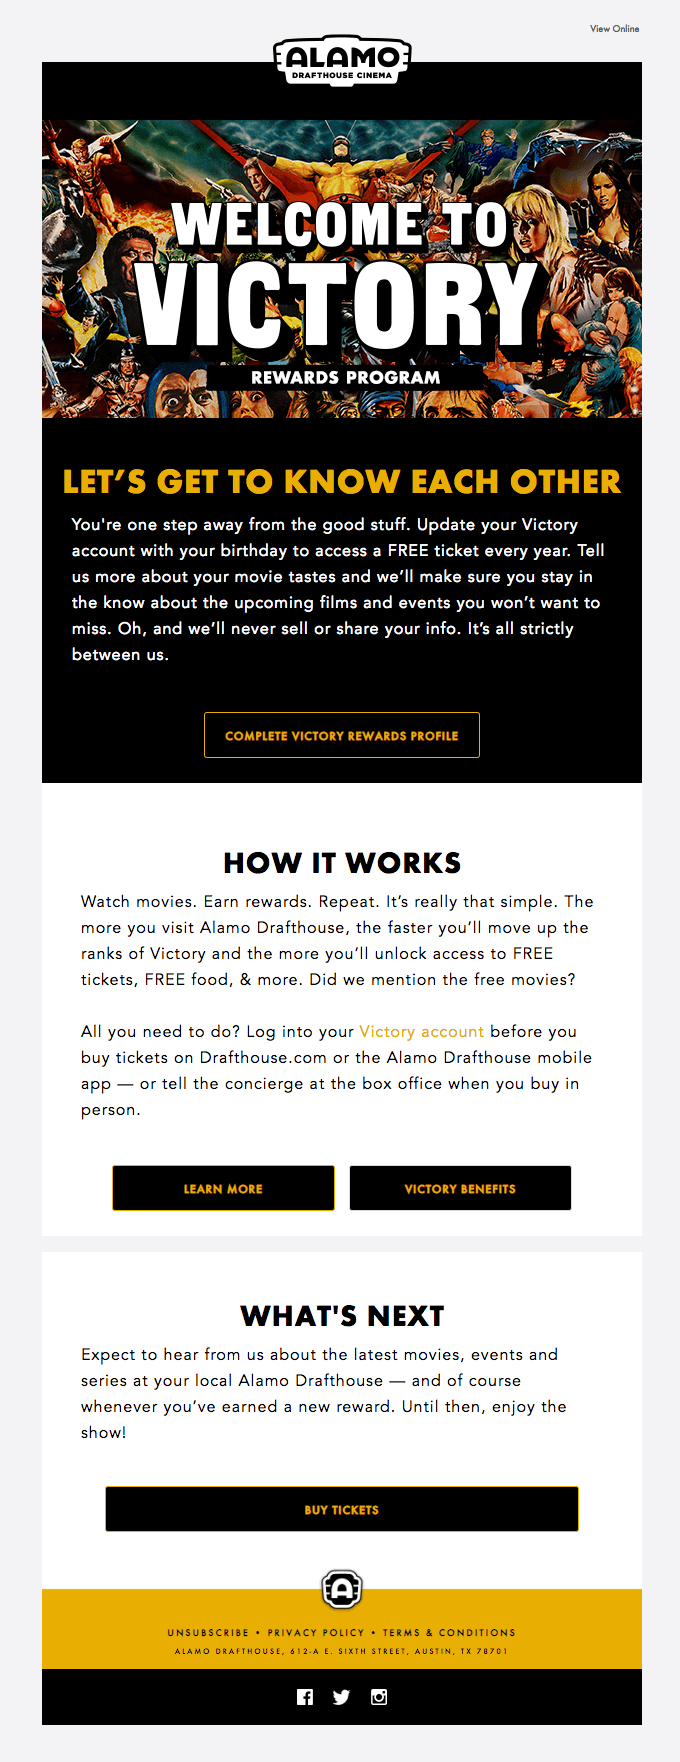
- Complete your profile: With the earlier section, you have introduced your brand to your subscriber. Now it is time for you to know them better, in order to provide them a good user experience. At the time of subscribing, the only details you have are the Subscriber name and email address. By inviting them to fill out their online profile, you create an improved database with multiple fields that you can use to personalize your emails better and create a stronger relationship with your subscribers. In this email below by Alamo Drafthouse Cinema has a link for the subscriber to enroll for their rewards program by completing their profile.
- Request to whitelist: Your chances of reaching your subscribers’ inbox depends on your sender reputation. When you are suspected to break the rules of email sent to spam, ISPs tend to blacklist your email address. This reduces your sender reputation. By requesting your subscribers to whitelist your sender address, you increase the credibility and that increases your reputation. What best time to ask them to do so except when you have the first interaction with them i.e. in your welcome email.
- Increase Social media followers: You have got them to subscribe to your email newsletter but why stop there? Email and Social media have their own individual forte so by adding links to your social media profiles in your emails, you encourage your subscribers to follow your updates on social media.
Action to be taken
Types of emails to send during Onboarding Stage
While during the onboarding stage, emails can achieve multiple tasks as stated above but whether you wish to achieve it all in a single email or an email series depends on your content. Ideally, it is advisable to spread your onboarding efforts across an email series. Let see how to spread the above-mentioned elements of an email into an email series.
Email# 1 The Welcome Email: Goal of this is simply welcome the people to your brand and offer your incentive. Here you set the tone of your business.
Email# 2 Pain Point Email: Here you address a specific pain point that motivated your subscriber to subscribe. You can suggest a tool or strategy and direct the focus of the benefits that you are providing. Links to resources or blog posts can be helpful here.
Email# 3 Social Proof Email: Show how others have been benefited from your brand. Include links to case studies and feature a snippet from it to set the ball rolling.
Email# 4 Doubt clearing Email: This email can feature FAQs that are identified from the blog comments, feedbacks, customer services chats to smush any doubts raising in your subscribers’ mind.
Email# 5 Offer an unexpected freebie: Your subscriber subscribed for an incentive but providing them another freebie makes them feel exclusive. A whitepaper or even a checklist can be similar to striking gold.
Email# 6 The sales pitch: Your business thrives on sales. Give a slight nudge with an email with a limited time offer to try and make your subscribers make a purchase. A countdown timer to trigger the ‘fight or flight’ emotions.
How to plan
Step 1: Map your customer journey
Place yourself in your customers’ shoes. What would you like to learn about from the brand you just subscribed to? What would motivate you to take action?
Based on the answer you get, the criteria for progressing between the stages in a customer journey becomes clear. This helps you decided between sending a single welcome email or an email series. Additionally, it also helps you decide the order of the emails be sent.
Step 2: Create separate paths for each segment
By setting up the customer journey, you create multiple paths based on customer preferences and choices, which eventually converge at the same end. The criteria for initial segmentation can be the source of subscription. Did they subscribe for the newsletter? Did they register for a free trial? Were they referred by an existing customer?
Based on the source, you create different paths that may coincide at certain points based on segmentation criteria.
Step 3: Create contextual content
Once the paths are defined it is time to provide information that is in context with their reason for subscribing. Newsletter subscribers are thanked and notified about the email schedule. Those subscribers who opted for a discount code are welcomed with the code along with a section featuring top products. Trial-opters get an email that instructs them about how to get started and the features they receive on paid accounts. Referral bonus subscribers receive a welcome email that focusses on introducing the brand.
Wrapping Up
As per the famous proverb “For Want of a Nail”, a small act that seems unimportant at the moment can have a great impact in the long run. Similar, the impression set during the onboarding stage has an influence on the relationships you build with your subscribers. Need help with creating a great onboarding email? Get in touch with us and we can be of your service.